
A guide on how to fix, tune, and mod the X-Arcade haptics kit.
First off, I absolutely love the X-Arcade Arcade2TV-XR controller. It’s a fantastic piece of hardware that has completely transformed my VR pinball experience. It also makes MAME games amazing to play. I highly recommend it to anyone into arcade games or pinball.
I recently received the X-Force Pinball Haptic Kit for my Arcade2TV-XR controller. While the installation process was straightforward, mostly just watching along with the video and connecting everything, my initial impressions were actually a bit underwhelming. Out of the box, the haptics felt weak, and the solenoids were incredibly loud with a high-pitched “thwack” that felt inaccurate to the mechanical sounds of a real pinball table. Furthermore, the speakers included in the kit had an annoying whine. However, I wasn’t ready to give up. After a few hours of tinkering, physical dampening, and even some DIY electronics work involving AI, I’ve dialed this kit into something fantastic. Here is my guide on how to fix, tune, and mod the X-Arcade haptics kit.
Step 1: The Software Balance
Before tearing into the hardware, I realized a lot of the “weakness” in the haptics came down to audio mixing. Since the haptics are driven by the audio output from the Meta Quest 3, the levels matter immensely. To get the right balance in Pinball FX VR:
- Maximize Physics Audio: Set the physics sounds in the game settings to the absolute maximum.
- Lower Everything Else: Drop music, voice-overs, and SFX to much lower levels.
- Crank the Controller: Turn the “vib” knob on the X-Arcade controller up significantly (60% of max, or higher).
- Headset Volume: Adjust the main volume on the Quest 3 until the signal is strong enough.
You can get very detailed and specific guidance for the optimal audio settings for each table in this excellent guide from Blahcade, here in this Google Doc.
Pro-tip: If you installed the kit yourself, check your mounting screws. I found that if the haptic speakers were mounted too tightly to the housing, the vibrations were stifled. Loosening them slightly allowed for much better resonance.
Step 2: Killing the Speaker Whine (The Splitter Mod)
With the haptics hitting harder, a new problem emerged: a persistent whine from the two main speakers included in the kit. It seems to be a board design issue or interference, and I couldn’t find a clean way to filter it out. The Fix: I decided to bypass the speakers entirely.
- I opened the controller lid and simply unplugged the wires for the left and right speakers. Silence achieved.
- To get game audio, I used a 3.5mm audio splitter cable coming from the Quest.
- Split A: Goes to the Aux In on the controller (driving the haptics).
- Split B: Goes to a pair of earbuds (or external speakers).
This was a massive improvement. The splitter I used had independent volume controls, allowing me to fine-tune the signal going to the haptics separately from what I was hearing in my ears. Note that this is not required, you can get a simple 3.5mm audio splitter cable without volume control and be fine. Critique: Honestly, X-Arcade should have skipped the built-in speakers and shipped the unit with a splitter. It would have lowered the cost and given users more flexibility to use high-quality headphones or external soundbars (like the Edifier Hecate G1500 one they sell).
Step 3: Taming the Solenoids (The Dampening Mod)
The solenoids provide the mechanical “kick,” but out of the box, they were harsh and loud.
 The Fix:
-
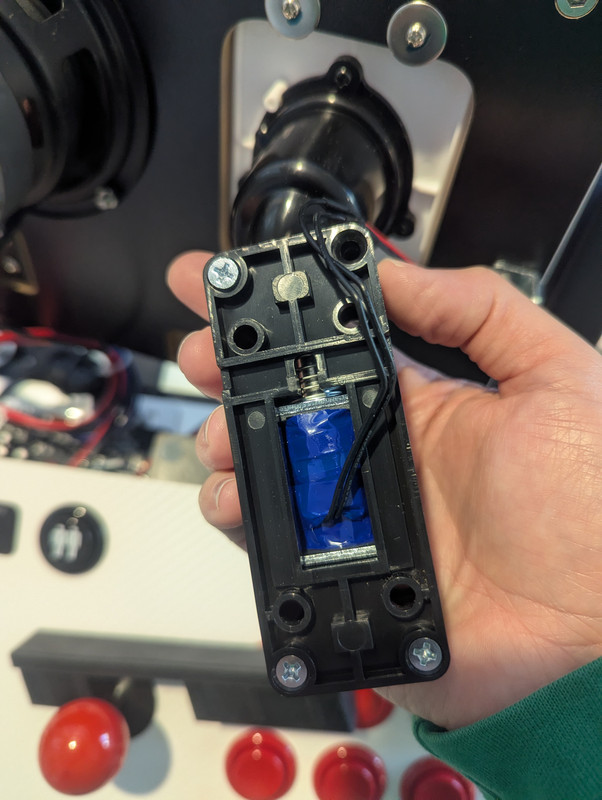
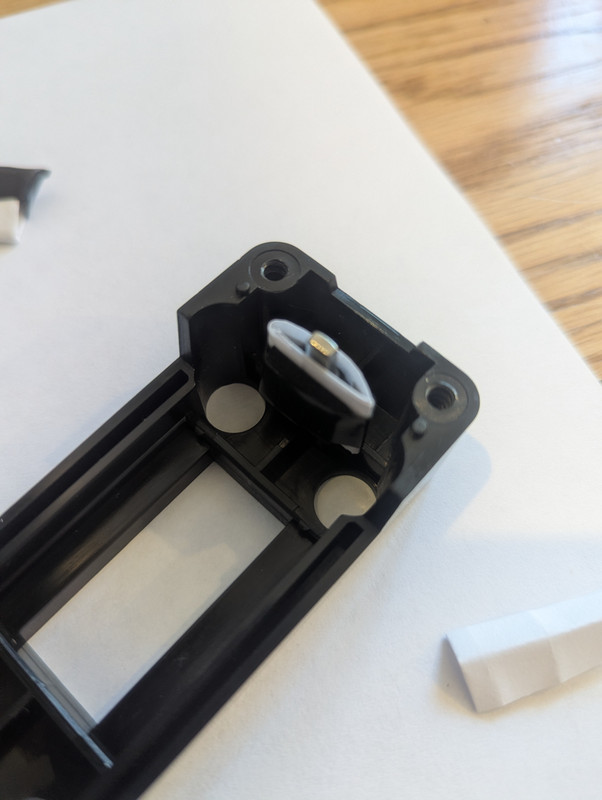
Access: Remove the solenoids from the controller panel (4 screws), then open the plastic solenoid housing/mount (4 more screws). There’s a solenoid on either side of the top panel (for the left and right flipper).
-
Strike Plate: You will see a metal strike plate covered in rubber/plastic. This is where the impact happens. I experimented with paper and electrical tape but settled on a piece of thin foam placed on this plate. I created a paper “sleeve” and put a small piece of foam on that and easily slipped the paper over the strike plate so its super easy to remove later, nothing sticky. You can see this in the photo below, but it’s dark so the small piece of foam is hard to see. Electrical tape wraps the foam and paper sleeve, holding it in place. This is where you can experiment with different materials and thickness.
-
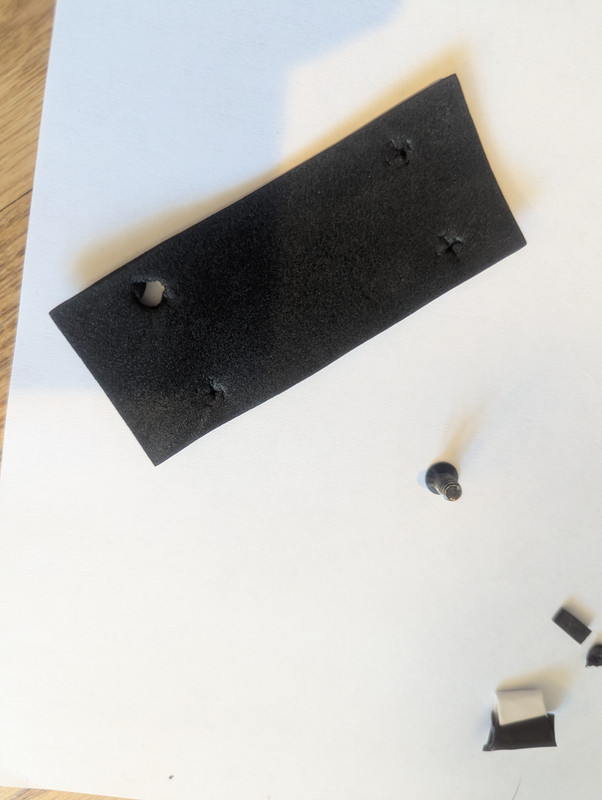
Housing Dampening: I added a second piece of foam sandwiched between the plastic housing and the controller panel itself. Punch some holes in the foam because the screws that mount the housing are not pointy.
The Result: The sound is much quieter, but more importantly, the pitch is lower. It sounds more like a heavy mechanical clunk rather than a sharp plastic slap. It feels significantly more realistic. This is subjective of course. If you want it louder, use thinner material or skip the strike plate dampening. To be honest, I over did it and it’s a little too quiet, but my wife and kids appreciate that—especially when they’re trying to sleep. I still get to hear and feel the flippers as if they are real. Obviously you can also turn off the solenoids and that was a smart call by X-Arcade to have that button.
Caution: You will realize that the plastic housing has some large openings in it. While you could cover these to muffle the sound, I would not suggest doing that. X-Arcade mentioned, in an update during development, that they fixed an issue with the solenoids overheating during long play sessions. I suspect this ventilation may be important.
Step 4: The Frequency Fix (The Low Pass Filter)
This was the most technical, but most rewarding mod. It’s also the easiest mod to implement, remove, and change if you decide to later. It does not require a screwdriver or opening anything up at all. The haptic speakers (exciters) were picking up everything—including high-frequency sounds like voices and music. Hearing people talking through your hand rest is immersion-breaking, and those frequencies don’t add any tactile value. The system needs a Low Pass Filter, similar to a subwoofer crossover, to block high notes and let only the low rumble through. X-Arcade didn’t include a crossover knob, so I had to improvise.
The Solution
I ordered an FMOD 70Hz Low Pass Filter (RCA) and the necessary 3.5mm-to-RCA adapters. This is a passive inline filter (one for each channel) that should cleanly cut frequencies above 70Hz. Note that they sell other filters that start reducing the volume as different frequencies (50hz, 100hz, etc.), but I think 70hz is going to be the sweet spot (update: I was wrong - I will try the 100hz next).
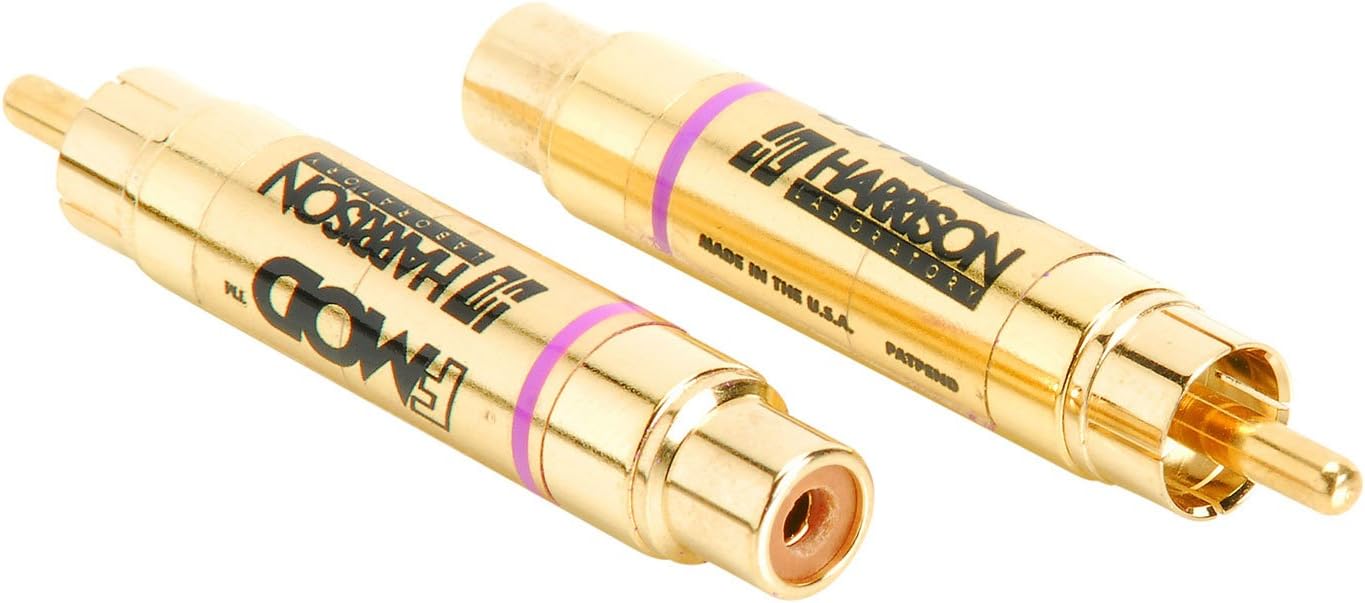
Important Note/Update: The FMOD 70hz filter was much stronger than my homemade test solution and I realize that it was a bit too strong. I’m going to try the FMOD 100hz next. I would suggest either that or trying to find a variable LPF so you can dial it in to where you want it to be. You still feel vibrations with the FMOD 70hz filter, but not as strong. This results in less or almost no vibration for the ball rolling around and only vibrations with other things.
A low pass filter with a 3.5mm input/ouput is rare and I couldn’t find any for sale. So this is why you will need the RCA adapters. I realize this adds a little bit of extra wiring, but you could probably hang it off the back of the controller deck or something.
A Quick Test to Prove the Theory
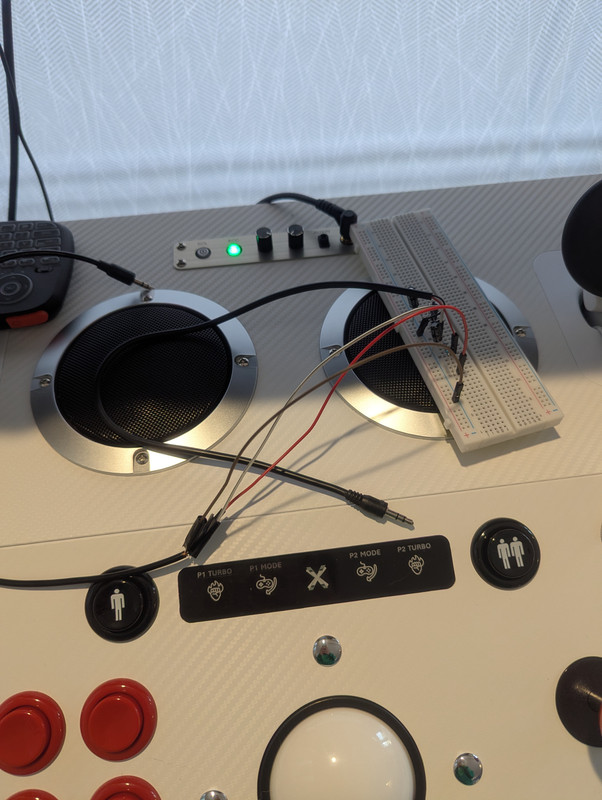
While waiting for shipping, I decided to build my own using parts that came with a Raspberry Pi kit, a breadboard, and some spare audio cables.
 I didn’t know the exact math for the resistors and capacitors, so I asked Google Gemini.
- Prompt: “How do I build a 70Hz low pass filter with these parts? (I listed the resistors and capacitors I had)”
- Result: Gemini told me which would result in a ~72Hz filter. Not exactly 70hz, but it would do. I even uploaded a photo of my breadboard wiring to have AI confirm I had it set up correctly (it even reminded me that I didn’t have it doubled for stereo).
It worked! The voices were immediately cut down to a faint whisper, leaving just the thud of the ball rolling around, bumping against things, and the flippers. Anything that made deep, low frequency, sounds. I later added a second stage (making it a 2nd-order filter) which worked even better but introduced some “insertion loss” (volume drop). This made the haptics feel weaker because of the loading, but not by a large degree and it was easy to increase the “vib” knob to compensate. The incoming FMOD filter should solve this with its better components to provide louder output in the frequency range we want.
Even the inefficient low pass filter I hacked together works so well that I’ll be using it until the FMOD filter arrives (update: again note that my filter worked better because it wasn’t as efficient - the 70hz FMOD was too strong, I will be trying the 100hz).
Final Thoughts
After these mods, the kit is performing exactly how I wanted. The vibrations are strong and isolated to physics events (and some sound effects and music with deep bass, which is fine), the solenoids sound realistic, and the audio is clean and balanced. A few other observations:
- The Plunger: It’s a great addition, though the “sweet spot” for skill shots is quite short. It takes some getting used to.
- Form Factor: The placement of the speakers and knobs makes it impossible to rest a monitor on the top deck (which I used to do for arcade games). I built a custom shelf using the old top panel by having it rest on top of the stand posts, allowing me to keep my monitor setup.
If you have the X-Force kit and feel it’s a bit “off,” I highly recommend the dampening and the audio splitter (so you can disconnect the two large speakers to remove the whine) mods at a minimum. They completely change the experience. The easiest mod is likely going to be the low pass filter and if you can’t stand the other audio coming out of the haptic speakers, that’s a quick solve without having to open anything up.